3D Printing Alternately Soluble Moulds
I have been developing a casting technique that leverages desktop 3D Printers and multiple types of soluble filament to create complex geometric sculptures out of concrete. If that is of any interest to you, read on!
With a Fused Deposition Modeling (FDM) 3D Printer capable of extruding two different materials, one can theoretically print anything. By using one material for the model itself (PLA,ABS,PET,Nylon,ASA) and another as dissolvable support (HIPS,Hydrofil,PVA,BVOH), everything from nested geometry, interlocking mechanisms, and steep overhangs can be fully supported.
The purple spring shown would be almost impossible to print without a support structure, as the nozzle would be printing new layers at an overhang far exceeding the recommended 45°.
Seems like an elegant solution, right? Unfortunately, there are some major drawbacks to multi-material printing. Prints take (in my experience) about twice as long, idling extruders and inactive filaments are a constant challenge, and material changes are always risky. Then there is the support material itself, which is usually finicky and expensive. So even though 3D printers are improving by leaps and bounds while simultaneously plummeting in price, most people are still hesitant to start printing with soluble supports.
So thats a short introduction to multi-material printing and soluble support material. Moving on!

Image Via Simplify3D
A few years ago, ZMorph (a company that produces a unique 3D printing/CNC/Laser multitool) made a blog post featuring an inspired use of soluble filament: Instead of supporting a printed part, they used PVA for a mould. A sculptor then cast the mould with metal powder infused resin and finally dissolved it by immersing it in water.

Zmorph 3D printer, printing in PVA. Image Via ZMorph

Sculptor casting metal filled resin into dissolvable PVA Moulds. Image Via ZMorph

Dissolving PVA around cured resin figurine. Image Via ZMorph

Sanding the figurine. Image Via ZMorph
That's pretty slick. Unfortunately the technique is deceptively limited, as I found when attempting to replicate it.
The fundamental problem with unsupported moulds is the geometric complexity that is introduced when you go from printing the model itself, a positive, to printing a negative "shell."
"3D Benchy" originally by Creative Tools
Printing and removing supports, even for a moderately complex model like Benchy, is relatively straightforward. But removing supports for the shelled version of this part is virtually impossible with single material supports.

In most cases, this is a job for soluble support material. But if your build material (grey) is itself soluble, it appears that you're out of luck. That is, unless you have two dissolvable support materials, each soluble in a different solvent. This Alternately Soluble strategy is what I have pursued for the last few months: I used two soluble materials to create a fully supported and dissolvable mould.
First Tests
When I started, I didn't have the right hardware for multi-material printing, so I began by producing soluble moulds out of a single filament. My first step was to build a Grasshopper script for shelling geometry. I spent a lot of time testing different methods of shelling (this is a well researched topic and a deep rabbit hole, so I won't get into the weeds with it here) and eventually created a script that combined the most robust voxelization methods I could find with the most reliable mesh splitting operations in Grasshopper.


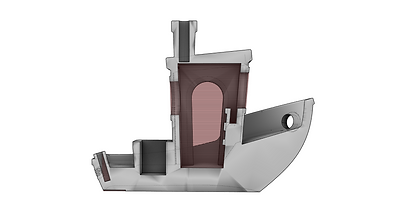
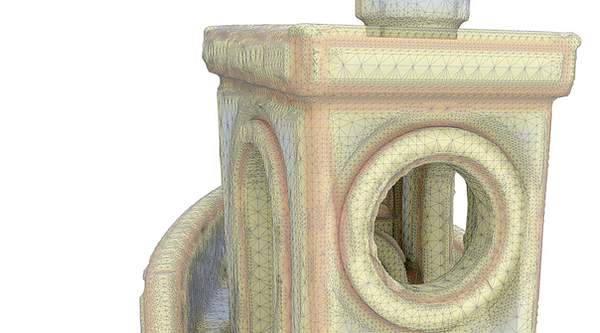
The first soluble mould sculpture I made was this twisted tower (left). I modeled it carefully to print well on my Prusa MK3 (Notice there is no overhang that exceeds 45 degrees). I then applied the splitting and shelling technique I had created in grasshopper (middle). The blue plane trims off the top of both the sculpture and its thickened voxelized counterpart, (red), and then joins them back together. The result is a printable shell with an opening for pouring something in, I planned on using concrete (right). I then sliced the model in Slic3r, printed it on in HIPS (High Impact Polystyrene), and set up for casting.

Behold! My state-of-the-art casting apparatus! Notice, there is a triangle of printed material that has been cut off the top of the mould. This was to widen the aperture through which the concrete could be poured. It turned out that the idea of using a funnel, particularly one with a 1.5 CM opening, was wildly optimistic.

For this project I used a product called ShapeCrete, a special type of concrete that can be molded like clay before curing. It's a neat product, but I think mine may have been waterlogged. Here's what I learned:
Use new Shapecrete. I originally purchased the Shapecrete back in 2016. I'm no concrete expert, but cement and concrete seem to have a shelf-life of about three months. This may explain why my Shapecrete was runny and poorly mixed.
It's not paste. I tried squeezing ShapeCrete out of a modified turkey baster, but no dice. The mixture coagulated in the neck of the baster and formed an unhelpful plug.
Give up on a pour. Again, this may have been due to the fact that my concrete mix was flawed from the start, but I was completely unable to pour the concrete. I ended up putting on gloves, depositing a glob of concrete onto the top of the tower's aperture, and pushing it in with my gloved fingers.
Wear a mask, gloves, and eye protection. Everything in this project is bad for your lungs, skin, and eyes.
Air removal is key to a good cast. I found for small scale concrete casting like this, a few sharp whacks with a stick helped the concrete to settle, as did agitation.
I waited two days for the concrete to cure before beginning the extraction process. HIPS dissolves in an industrial degreaser called Limonene, which is made from citrus rinds and smells fantastic. But it's pretty expensive, and prices fluctuate with availability. The 32 Oz. can I used cost $26, and it didn't get me very far. HIPS filament itself is pretty cheap though, at about $20/Kg. Limonene is also best stored in glass, and I chose a Mason Jar because I could dissolve and store HIPS in the same container thanks to the large mouth.

Once the Limonene was poured in around the cast, I let it dissolve. How long this takes is dependent on the ratio of HIPS to Limonene, the purity of the Limonene, and the geometry of the HIPS that is being dissolved.
My first sculpture had an almost ideal ratio of volume to surface area (though the walls were a bit thick), and the Limonene was new, so the mould dissolved in about a day. However, the sculpture had a thick coating of viscous Limonene/HIPS when I first extracted it. I found the best way to get rid of the syrupy mess was to submerge the piece in a large bucket and spray it with the "jet" setting on my garden hose. It's also best to submerge the hose a bit, so the water doesn't ricochet everywhere.
Beginners luck!
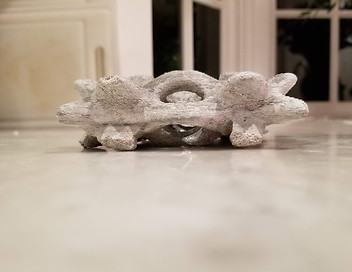
My first piece was a success; dissolving HIPS around a concrete cast worked as I'd hoped. For my second test, I wanted to try something with sharp edges, and I came up with this:
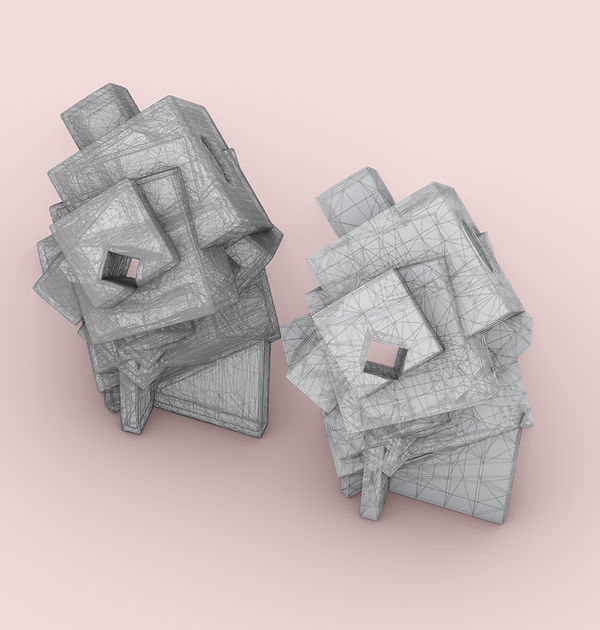
The original model is on the right, and the shelled, cast ready version is on the left. I figured I might be able to "inject" a watery blend of concrete into the sculpture. But as I pointed out earlier, this was wishful thinking. Getting the concrete into the HIPS mould was a manual process; I deposited concrete onto the circular orifice of the shell, and packed it in with my finger.
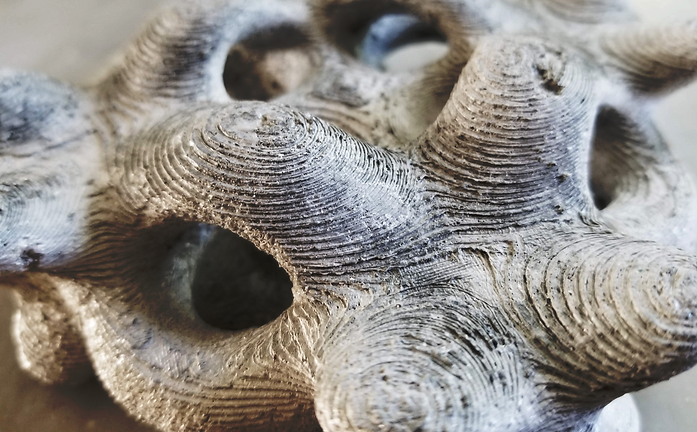
The resulting sculpture was highly brittle but well-detailed. Even the internal cavity that transects the object was preserved.


With these two tests complete, I was confident that I could use HIPS for one of the dissolvable materials in the Alternately Soluble approach.
Adventures with Hydrofil
Remember, my goal was to use two alternately soluble filaments as build and support. HIPS, as my first tests confirmed, seemed a likely candidate for the mould material due to the level of detail preserved, and its resistance to moisture. So what could I use that would function as the support?
I took to the Internet to find out. I looked at all manner of support filaments. HIPS prints at about 240°, with a bed at between 60°-80°, so I had to find a filament that printed within about 10° of those values. PVA turns into an unprintable clog at temperatures above 200°, so that was out.
Another support candidate was BVOH, made exclusively (at the time) by a company named Verbatim. BVOH prints at 220°, which made it at least worth testing. However, BVOH was eliminated as a candidate due it's scant availability. When I was researching soluble filaments in August and September of 2018, it was completely out of stock in every online marketplace that listed it. (As of March 2019, BVOH can be found for $50/.5KG)
I was pretty stuck until I ran across this stuff called Hydrofil.

Image Via Airwolf 3D
Hydrofil is produced by Airwolf, a manufacturer of 3D printers based in Southern California. They bill their Hydrofil filament as a support material that works well with Nylon and ABS, materials that print in the same range as HIPS. I could only find three reviews, all of which stated that Hydrofil was tricky, but, if stored and printed properly, would function as advertised.
So I bought some at 99$/.5KG. The Hydrofil arrived in a sealed plastic bag, and I got to work doing some tests. As the reviews stated, this stuff was tricky. I had difficulty for the first time ever getting something to adhere to my Prusa MK3's powder coated steel sheet. Enclosing the printer helped a bit, as did shutting the garage my MK3 lived in, but there was a limit to how much Hydrofil improved. After a round of prints failed during my first day of testing, I stored the filament in what I thought was a dry box. But when next I brought the filament out to do more tests, I noticed the telltale popping sounds that meant my expensive, water-sensitive filament had absorbed ambient moisture and wouldn't print properly. Shit.
Fortunately, moisture absorption isn't a death sentence for a roll of filament. I dried the Hydrofil out in a toaster oven, tried printing again, and had some luck.

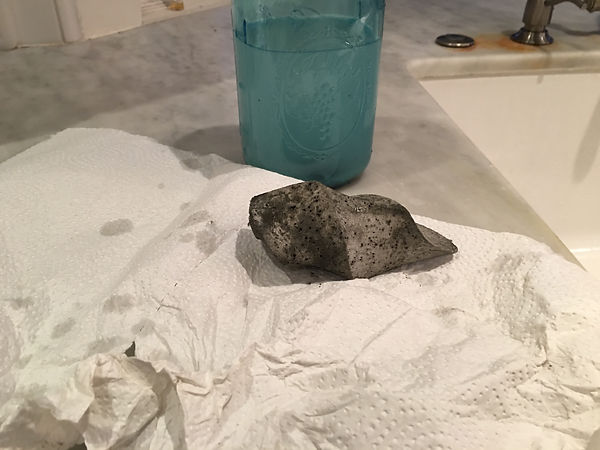
Good Morning! Casting concrete with an open flat face like this was mercifully simple, and I got three well-detailed casts. Unfortunately, they've all since broken and this is all I have left:

At least I still have the good part.
Compared to dissolving Limonene, Hydrofil was a dream. I immersed the tiles in a gallon of cold water, and within two days, it had disappeared from all but the most minute crevices. The rules for dissolving Hydrofil are similar to those of HIPS: virgin solvent works the best, agitation speeds up the process considerably, and the smaller the shell's volume to surface ratio, the better. Hydrofil performed adequately enough, so I considered the search for alternately soluble filaments complete.
Printer Selection
By the time I had finished doing my casting tests in HIPS and Hydrofil, it was November 2018, four months after I really began pursuing the Alternately Soluble technique. There was a fundamental matter to resolve before I could proceed any further: How to print two materials at once. I had a few options for Multi-Material FDM printing, and I'll run through them here.
A traditional dual setup runs with two extruders operating side by side on the same carriage. This means that while one extruder is printing, it is carrying the inactive extruder with it, oozing on the print all the while.

Image Via Diabase Engineering
Another method of multi-extrusion is having two extruders push filament through a single nozzle. This is probably the least expensive way to get started, but I didn't look forward to dealing with filament changes in a single nozzle, particularly with HIPS and Hydrofil.
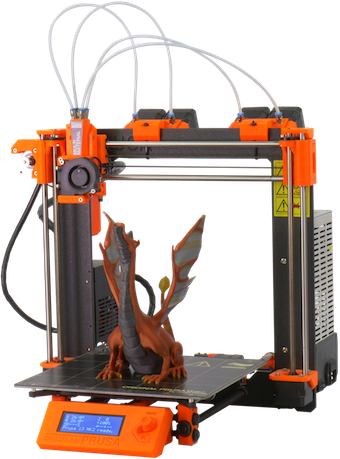
Image Via Prusa3D
A third method is filament splicing. Mosaic Manufacturing offers a range of filament splicers (the Palette, Palette+, Palette 2) that function by using heat and pressure to splice together predetermined lengths of filament into a single strand which is run through a printer's extruder. The Palette system is an incredible feat of engineering wizardry, but is still a bit undercooked.

The Palette 2. Image via Mosaic Manufacturing
Last but not least are the IDEX (Independent Dual Extruders) systems. IDEX systems have two completely separate extruder assemblies running on the same axis. Each extruder can be controlled independently in terms of motion, cooling, temperature, extrusion, even nozzle diameter. In my opinion, IDEX is the most robust approach, so I narrowed the list of potential machines to those with IDEX systems.

Image via BCN3D
I then narrowed my options further by eliminating anything with a Bowden system. Bowden printers drive the filament through a long tube that connects to the hot end

Note the Ender's extruder motor is positioned off the X carriage. Image Via Creality
The upside of Bowden setups is that their motion systems aren't required to move a heavy motor around, and therefore are faster and more precise. The downside is that Bowden systems have poor control over filament extrusion, retractions in particular. In addition, the tube from the extruder to the Hot-End increases the amount of force required to push the filament through the heated nozzle, often leading to jams. With the finicky filaments I planned to work with, I wanted as much control and reliability as possible.
What I eventually bought was the T-Rex 3.0.
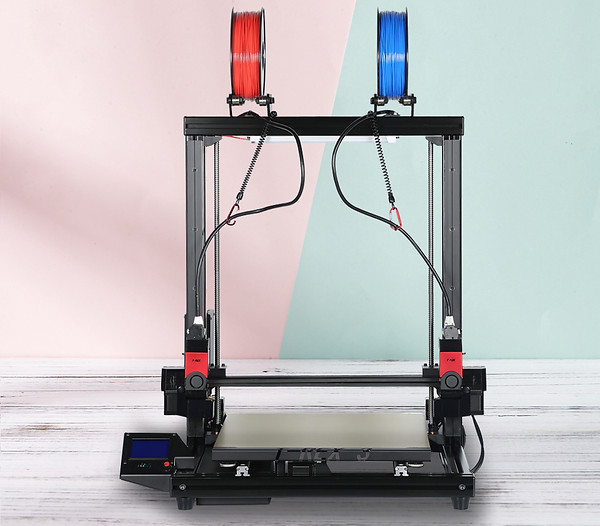
Image via Vivedino
The T-Rex features an I3 style motion system, independant direct drive extruders, and a high-temperature heated bed. It is also compatible with common aftermarket components, making repairs and modifications easier.
IDEX systems are notoriously difficult to calibrate, and the T-Rex was no exception. Couple these difficulties with a few quirks peculiar to the T-Rex's implementation of the Marlin firmware, and it was a few weekends before I had the T-Rex running. I began with single material prints, then dual material calibration tests, before graduating to a fully supported Benchy printed in PETG and PLA.

Close enough! I was finally ready to test the Alternately Soluble approach.
Benchy 3d Model by Creative Tools
Alternately Soluble Printing and Casting
Believe it or not, somehow I hadn't even designed the sculpture that was at the center of all my efforts. My parameters were that the piece had to be short and squat, and feature geometry that would be highly impractical to create a mould for with traditional techniques.
I ended up modeling this thing:

Then I opened up my shelling script and ran it to create the shell and support geometry.

Capture of my Grasshopper Script
The script outputs closed interior and exterior meshes, which I exported as independent .STL files. I then brought the files into Simplify3D and used the native dual extrusion wizard to position the two models.
.png)
Image captured from Simplify3D
I prepared a printing profile within Simplify3D that had configurations for HIPS and Hydrofil. After slicing the model this is what the gcode preview looked like.

Hydrofil in green, HIPS in blue. Image captured from Simplify3D
I expected a month of troubleshooting, but my first multi-soluble print went off without a hitch.

About an hour in.

Finished!
It was a pleasant surprise. There was still some stringing and a few zits, but altogether the sculpture was better than I had any reason to expect.
I attribute the success to:
-
Magigoo - Apparently nothing grabs onto Nylon quite like this stuff, and I thought I'd give it a shot. Lo and behold when the first layer of Nylon based Hydrofil went down it adhered firmly to the bed. The Hydrofil was so firmly anchored that it essentially fixed the HIPS filament in place, keeping it from delaminating.
-
An enclosed print area - My Formbot lives in a spare closet with one tiny window and a single door, so the ambient temperature rose considerably during the print. For most specialty filaments, an enclosed build chamber is required (warm ambient temperatures prevent warping). Hydrofil in particular seemed to appreciate the trapped heat, as it exhibited the most consistent inter-layer adhesion I'd seen.


Multi-Material Mould from the bottom.
Mould from the top.
Now that I had this print I'd worked so hard for, it was time to destroy it. The next step was dissolving the Hydrofil on the interior of the print. My plan was to submerge it in water and give it a day or two. The buoyant plastic sculpture was pretty watertight, and thus floated on the surface of the tank. I weighed it down with a brick.
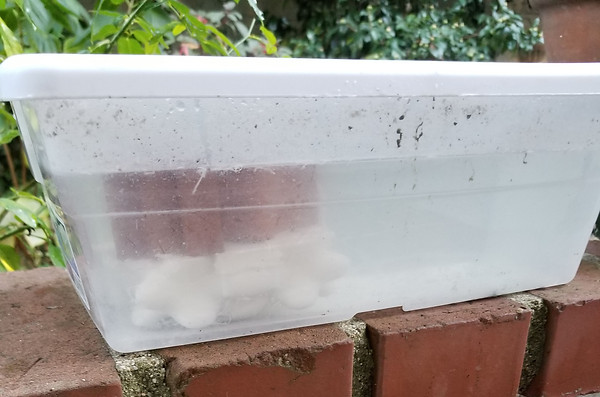
Sleeping with the fishes.
After an hour of submersion, the sculpture had softened where the Hydrofil touched the build plate, but the water wasn't reaching the internal cavities. So, I revisited best practices for dissolving Hydrofil: I filled the tank with warm water, submerged a garden hose, and then blasted jets of water into the sculpture's openings. Water began to seep into the internal cavities and dissolve the Hydrofil support, and I was able to manually remove large chunks as it softened. I repeated the process a few times, changing out the water, manually removing the Hydrofil where I could, and blasting the garden hose into the cavities. In this way I was able to completely remove the Hydrofil support in a single day.
After dissolving the Hydrofil I went straight to casting. I prepared my concrete mix as best as I could given the circumstances, but I could tell that I was in for some difficulty. The concrete refused to mix properly, turning instead into a watery slurry atop a heavy sludge. What I should have done was get new concrete. Somehow, I decided the better move was to pour the heterogenous concrete mixture on top of the openings of the HIPS sculpture and force the sludgy concrete in with my gloved fingers. It was slow going, but after a while I was able to force a sub-optimal mixture of concrete into the sculpture. I poured the excess concrete into spare HIPS moulds.

Casts prior to Limonene immersion.
I had contaminated Limonene leftover from my previous experiments which was still useful, and the rest of the virgin Limonene in its original tank. I poured both into a Pyrex container, and immersed all the concrete sculptures at once.
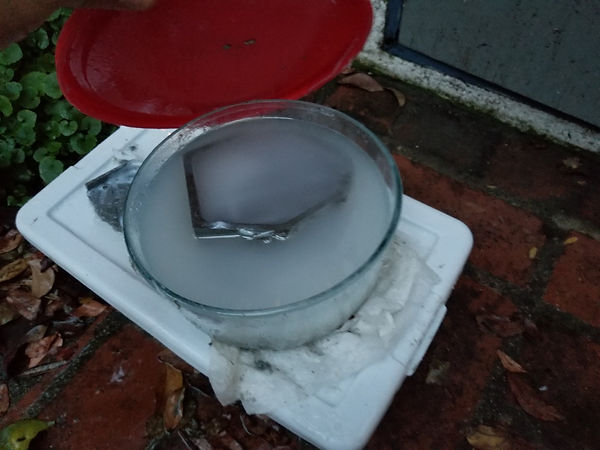
First peek under the hood.
After 24 hours, the smallest test piece was broken and I threw it away. The mid-size test was dissolving well, but I later broke one of the sides, and threw it away as well. The large test appeared to be dissolving slower than the others. The sculpture in which I was most interested, however, was still entirely encased in its HIPS shell. I left the pieces in the tank for a few more days, and the sculpture showed signs of progress.
Limonene's (or any solvent's) potency decreases with dilution. So it didn't help that I had immersed all three test pieces in the same container as the sculpture I was most concerned with. I ended up leaving the sculpture in the gradually-worsening Limonene for a total of ten days. When I finally removed it, most but not all of the limonene had dissolved, due to inaccessible areas of the sculpture. Remember this?

Due to the way I cast the sculpture there was concrete in all the outer crevices. I assumed the HIPS was still accessible to the Limonene, and perhaps if I'd left the sculpture in for a month, it would have been okay. What I was effectively left with was a concrete sculpture with a lot of still solid HIPS stuck to it. I ended up just going at the sculpture with a screwdriver and prying away the remaining shell by hand. It was about two hours of sweaty, poisonous work, and I swore off using Limonene ever again. Below are the results.


Lessons
The Alternately Soluble approach might be more trouble than its worth for concrete.
It's entirely possible I'd have better results with a proper mixture, but it was my experience that concrete doesn't like to be forced into thin complicated shapes.
Limonene is dangerous
I still haven't figured out how to dispose of my HIPS-infused Limonene. I can't flush it, throw it away, or give it to my local paint store. It looks like I have to drive it out to a special chemical recycling place about 30 minutes from my house. I have a hard time believing that everyone using Limonene to dissolve HIPS is disposing of it responsibly.
Concrete is an art and a science. Follow best practices.
You won't get good results if you ignore the directions on the box. Don't allow your stored concrete to absorb moisture. Follow the mixing ratios. Don't pour it until its of a uniform consistency.
Hydrofil is the real deal.
Magigoo is required, an enclosure is highly recommended, and you've already lost if you try to print it wet, but Hydrofil will perform as advertised. Props to Airwolf for creating the only ABS/Nylon compatible water-soluble support material.
This is the wrong scale for concrete.
There are better stone based materials for smaller, high resolution casts, such as plaster, gypsum, or filled resins. There are also some commercial grade stone finishes used for kitchens that I'd like to try.
Now What!?
The multi-soluble technique is a pain in the ass, but there are a ton of ways to make the process simpler and extendable beyond the build volume of a desktop printer.
A few things I want to try:
-
Building the shell out of nylon, supporting it with Hydrofil, and pre-weakening it along a set of seams. The nylon shell could be cut away afterward.
Orange areas are pulled towards the interior boundary of the mould.
-
Using other types of soluble filament. One that I am particularly keen to get my hands on dissolves in IPA, making it a potential replacement for HIPS.
-
Assembled, Multi-soluble concrete sculptures. This would involve a script for creating "voxelized interlocking assemblies" with automatically generated printed hardware for clamping the various parts of the sculpture in place during casting.

A preliminary script I made generates tabs on the shelled model.
-
Mold releases and oleophobic coatings for easier extraction of the cast from the mould.
Final Thoughts
I conducted this experiment on my own, with my own time and money. I freely admit that this experiment wasn't conducted to an exacting standard. I will be posting some of my models and grasshopper definitions if anyone wants to run with this.
I've never seen anyone cast anything using the Alternately Soluble approach before, and it's entirely possible that I'm the first person to do so. If I'm wrong about that, please let me know!